Feeds:
Posts
Comments

Archive for the ‘recipes’ Category

That wasn’t the end of the barbie.

After the kids went to bed, I randomly googled a bit more about Australian food and read about damper. It’s a traditional Australian bread prepared by travellers as they went through the bush. The traditional recipe requires very few ingredients because the travellers would only have had basic rations with them on their long journeys. The basic ingredients are flour, water, and salt. As the camp fire died down, the damper was buried in the ashes of the fire and left there to cook.

I ran to check if the ashes from the barbie were still hot. They were!

Hurried to the kitchen. There was just enough flour.

20160411_222701

My unbaked damper

Quickly mixed the ingredients together, kneaded the dough, flattened it, and with tongs in hand went back to the mini-pit. I made a small depression in the ashes and put the dough straight onto the bed of ashes in the traditional way, then covered it with more ashes and the remaining hot coals. Actually you can also use a dutch oven to cook the bread in the fire, but I thought why not do it as traditionally as we can since we’re at it.

Buried under the ashes

Buried under the ashes

It did cross my mind whether it was healthy to have ashes sticking to the dough, but I figured that this was a traditional method that has stood the test of time, plus many cultures cook food in the ground. So I crossed that thought out.

I went to shower and do other things. In fact, I almost fell asleep!

As I was nodding off I suddenly remembered my damper and ran to retrieve it from the ashes. It was cooked through, and had a hollow sound when tapped. That’s the test to know if your damper is cooked. The centre bit was burned from being cooked too long though.

Burnt in the middle!

Burnt in the middle!

I left it to cool on a rack and headed to bed, eager to tell the boys about it the next day.

The boys were so surprised to learn that you could cook bread from the hot ashes of a barbie. They gamely tried the bread and loved it! We had it with honey, jam, and butter. I loved the smokey flavour of the bread. Pity that I had left it too long and the middle part was inedible.

We agreed that this was definitely something we want to make again, and that we should try it at the next barbeque. Apparently you can even cook it on a stick like how you cook marshmallows. Some travellers got tired of waiting for the bread to cook in the ashes, so they wrapped a bit of dough around a stick and cooked it over the fire. They’d then fill the hole that was left in the bread with jam or honey and pop the whole thing into their mouths. Sounds delicious!

Ellery came home telling me how he told everybody in school about damper, how he had promised to bring some for them, and how I had to make it again. So he woke me up at 645am in the morning to make damper for his friends.

There are many modern versions of damper that use more ingredients and bake the bread in the oven. We made a damper using milk, but deliberately decided to keep it as simple as possible because we wanted it to be authentic, so left out the butter and cheese, etc. Ellery was even skeptical about using milk because he really liked the plain, traditional version.

20160414_073116

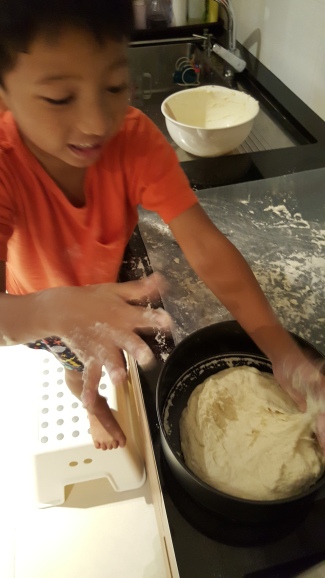
Shaping the dough into a ball

Pressing down the dough in the pan.

Pressing down the dough in the pan.

20160414_082727

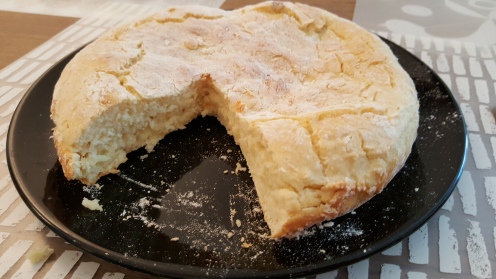
Oven-baked damper

This modern damper was still good, and went well with butter and jam. Like a bushman’s scone I suppose! But the ash damper has an extra oomph that we all prefer.

I cut a hunk of bread for him to bring to school to share with his friends. You could see the look of satisfaction on his face at being able to share something he had baked himself :)


Recipes

Traditional Damper

2 cups self-raising flour
1/2 tsp of salt
2 cups of water

Mix everything together. It will be a bit runny at first. Turn the dough out onto a floured surface and knead for a bit. Not necessary to knead for a long time (I saw one video where the lady didn’t even knead it). Shape the dough into a ball then flatten it. Make imprints all over it with your fingers. Make a clearing in the ashes, put the flattened dough straight onto it, then cover it with more hot ashes. Cook for about 40 minutes.

*The updated version we did was to substitute milk for water. There are many other versions you can find online, including adding herbs. I thought rubbing in butter would make it too much like scones though, rather than bread.

This video shows how to put the dough into the ashes.


Nair Food Adventure

  1. The Beginning of Our Food Adventure
  2. Week 1 – Down Under: Barbie

Read Full Post »

First stop, Australia!

My first thought when we picked this country was, barbeques! Or barbies, as they are better known in Australia.

So we started off our food adventure with a little barbie in our balcony. Sounds like a nice idea right? I imagined us sitting around a barbeque, chit chatting, letting the kids turn the food on the grill. Lots of good, fire-side bonding.

Nope. It’s probably the last time I’m gonna have a barbie at home. I wouldn’t say I was going to burn the house down, no, not at all. But I think we did create a lot of smoke. Enough to make people downstairs think there was some kind of fire, possibly. I realised the culprits were the meats. The oils from the popping sausages, and the marinades from the chicken dripped onto the hot charcoals which resulted in a lot of smoke. I kept trying to fan it outwards, away from the house, but found that there was still a slight smoky smell lingering in the house after the barbie. We ended up hiding behind the balcony doors, while I quickly popped out into the balcony every now and then to turn the food on the grill. Not quite what I had in mind.

20160411_200145

Tucking into the food. We decided to sit by the balcony for dinner :)

But oh boy. The food was so good. And I think the kids must have been so hungry by the time the food was ready that they were full of praises for the food too. I was especially surprised to see Asher repeatedly asking for more sausages! He’s never really wanted to eat them in the first place, yet here he was happily tucking into them, telling me how yummy they were. Maybe it’s the type of sausage. Note to self, chipolata sausages go down well with the kids. They really were fabulous though! Sausages grilled over a fire win sausages cooked in a pan or toaster any day! And the pre-marinated chicken we bought tasted perfect. On offer too. Score!

The highlight was the pineapple though. I remember loving the grilled pineapples from the restaurant Brazil Churrasco, somewhere I haven’t gone to in more than a decade, and wanted the boys to try it. It was a hit. They couldn’t get enough of it! And it was a breeze to cook – no smoking!

20160411_200154

Balcony barbie. Waiting for the pineapples to be ready.

Overall, the barbie was a success. The kids continued to talk about the food right up till bedtime, saying we should have another barbeque again soon :)


Nair Food Adventure

  1. The Beginning of Our Food Adventure

Read Full Post »

Shepherd’s Pie

Asher had pie in school one day, and the boys decided they wanted to make pies to eat at home.  Ellery wanted shepherd’s pie, while Asher wanted to recreate the “creamy chicken pie” he had in school.

First up, the shepherd’s pie!

It’s a fairly easy recipe, so it was quite simple to get the boys involved.  This was also one of the rare times I let the boys go near the stove.  It was quite a simple job of stirring ingredients in the pot, and there wasn’t going to be hot water splashing about, so I let them help out.

Frying the onions

Frying the onions

Stirring in the meat

Stirring in the meat

Assembling the pie

Assembling the pie

The result was yummy, and the boys ate heartily!  Plus, I get to fulfil my red meat quota.  Win-win all around!

Ready to tuck in!

Ready to tuck in!

Yum!

Yum!

Here’s the recipe I used:

Shepherd’s Pie

Ingredients:
550g minced beef
2 carrots diced
1 onion diced
2-3 cloves of garlic chopped finely
1-2 tbsp plain flour
1.5 cups of chicken stock
a dash of black sauce for colour (maybe 0.5 – 1 tsp)
salt & pepper to taste
1-2 tbsp olive oil

For the topping:
5-6 potatoes, boiled
cheese – as much as you please (we used about 1 cup of shredded cheese)
some milk
pepper to taste

Method:
1. Preheat the oven to 210 degrees celcius.

2. Make the potato topping.  Add a dash of milk to the boiled potatoes and mash together.  The milk is to help make the mashed potatoes smoother.  Add the cheese.  Then add more milk gradually to your desired consistency.  Spinkle some pepper to taste.  Done.

3. In a heavy based pot, heat the olive oil then add the garlic and fry until fragrant.  Add the onions and carrots and fry for  2-3 minutes until the onions soften a little, but not too much.  Add in the flour, give the mixture a stir, then add in the stock.  Bring the gravy to the boil then reduce the heat and simmer for about 3 minutes.

4. Add the meat, making sure to break up the large chunks.  If the sauce looks too watery for you, add a little more flour.  Add the black sauce to give the dish some colour.  Add salt & pepper to taste.

5. Spoon the meat filling into pie/casserole dishes, top with potatoes, and pop into the oven for about 25-30 minutes.

Read Full Post »

For the last few family birthday gatherings I’ve been baking the birthday cakes just for fun.  I like to bake, but it’s always too much cake to eat at home.  So occasions like this are perfect to share the cal…the goodness.  And generally the family are willing to try my experiments, however badly they may turn out haha.

Since we were going to have a full Chinese dinner, I decided something light and fruity would be good.  The berries this season are exceptionally sweet, so they were a natural choice.  Instead of a triple layer cake, I stuck to a two-layer cake.  And I searched for an alternative sponge cake recipe, because the one I used to use has been falling out of favour with me because I find it too sweet.  I also searched for a less-sweet frosting recipe because I really, really, don’t like sweet frosting.  I’m the kind that will sweep away all the icing on a cupcake because it’s usually just too cloyingly sweet.  It’s really wasted on me.

After some researching, I decided on a Victoria sponge recipe, and found a cooked frosting recipe to try.  I generally try to find recipes that aren’t too complicated and that do not need too many ingredients.  The Victoria sponge turned out pretty well, though I think I can still cut back on some sugar.  I added lemon to give it a zesty boost to complement the berries.  The frosting was also less-sweet than regular icing as promised, but again, I think I can cut back on the sugar.  Why are these things so sweet??  I added cinnamon to the recipe too as cinnamon and berries just go so well together.

My little helper grating the zest

My little helper grating the zest

Folding in the flour

Folding in the flour

Assembly was easy.  I wanted to do the ‘unfinished’ look, so cake, frosting, berries, cake, frosting, berries, and I was done!  And the best part, it looked so beautiful because of the berries!  I was very happy when everyone, including the service staff at the restaurant, thought we had bought the cake.  And it was no effort on my part really.  The prettiness of the berries just brought the cake to another level.

Berry cake

The cake tasted good after a heavy meal.  It was light as intended, not too sweet (though in my opinion still can be less sweet.  But I’m a savory person, really), and was pretty as ever.

Here’re the recipes I used, adapted from here and here.

Lemon Victoria Sponge Cake

Ingredients:
225g self-raising flour, sieved
225g butter, at room temperature
225g extra fine caster sugar
4 eggs
1 tsp baking powder
Zest of 1 lemon
Juice of 1 lemon

Method:
1. Preheat the oven to 180 degrees C
2. Cream butter and sugar together until smooth and fluffy
3. Add eggs and juice to the bowl and whisk some more
4. Fold in the flour, baking powder and lemon zest
5. Pour into 2 round tins
6. Bake in the oven until golden brown for 20-25 minutes
7. Cool on a wire rack before decorating

 
Less-Sweet Cinnamon Cooked Frosting

Ingredients:
1 cup milk
3 tbsp corn starch
200g caster sugar
100g unsalted butter*
100g vegetable shortening*
1/4 tsp salt
1 tsp vanilla extract
2-4 tsp ground cinnamon (depending on how strong you like it to be)

* You can use all butter for more flavour, or more shortening for more stiffness (good for warm weather).  I did 50/50 to get the best of both worlds.

Method:
1. In a saucepan, mix the milk and cornstarch and heat while stirring until the mixture thickens into a paste-like consistency.  Cool to room temperature.
2.  Cream the sugar, butter and salt together.  Add the vanilla, cinnamon and cooled milk paste then beat until the mixture is smooth and light.  The frosting is ready for use!

Read Full Post »

There’s a nice man who works at one of the food outlets near the kid’s school who has bought us breakfast on several occasions.  We decided to repay his kindness by baking him a cake!

We saw a recipe for a lemon yoghurt cake in one of the children’s books and decided this would be the cake we’d make.  It’s a really easy recipe and I like that you don’t have to deal with butter.  Most cake recipes start with creaming the sugar and butter, which can get quite messy with kids, even though I’m always fascinated at how it rises to become fluffy and whitish.  I also like that you use the yoghurt pot to measure out some of the ingredients.  It’s a lot easier for the kids.

We made two batches.  One for the nice uncle, and one with strawberries for ourselves.  It was quite iffy whether the strawberry version would turn out nicely since it was an improvisation, so we thought it best to not put strawberries in uncle’s cake as well.

I was really pleased to see Asher grate the lemon zest all by himself!  Had to remind him a few times initially to keep his fingers out of the way because skin was not part of the ingredient list, but after that he was good.

Stir stir stir

Stir stir stir

Mix Mix Mix

Mix Mix Mix

Pour pour pour

Pour pour pour

The cake turned out really well too!  The original recipe has a subtle lemon taste, while the one with strawberries has a lovely tartness to it.  Both are rich, dense cakes.  Yum!

Yum yum yum

Yum yum yum

Lemon (and Strawberry) Yoghurt Cake 

Ingredients:
1 pot of natural yoghurt
2 yoghurt pots full of caster sugar (we did 1 pot white, 1 pot brown)
3 eggs
3 yoghurt pots full of plain flour
2 tsp of baking powder
1/2 yoghurt pot full of oil
1 lemon
some butter
(optional) two cups of strawberries, sliced

Directions:
1.  Preheat the oven at 180 degrees Celsius.

2. Put the yoghurt in a mixing bowl.  Wash the pot and dry well.  You need the pot to measure the other ingredients.

3.  Add the sugar and eggs and whisk.  Then slowly add the flour, the baking powder, and finally the oil.

4. Wash the lemon.  Grate the peel.  Then squeeze the lemon.  Add the juice and zest to the mixing bowl.  Beat the mixture until all the liquids are soaked up.  If adding strawberries, now is the time to stir it in.

5.  Butter a baking tin.  Pour the contents of the bowl into the tin.  Bake for 30 minutes.  Leave to cool before taking out of the tin.

Read Full Post »

I picked Ellery up for swimming one day when his class was just starting their cookery session.  They were making popcorn chicken and he very much wanted to join in.  I coaxed him away by telling him we could ask the teacher for the recipe and do it at home.

For the rest of the week, he kept reminding his teacher every single day to send us the recipe.  He also asked me every day, “Have you received the recipe?  We are going to make popcorn chicken right?” So when I finally got the recipe, I made it a point to get all the necessary ingredients (well, almost…I forgot the Parmesan cheese) and we had our own little cookery session at home just him and me.  Asher wanted to play instead.

I was glad to see that Ellery didn’t get squeamish about getting his hands dirty.  Instead, he diligently coated the pieces of chicken in flour, egg, and crumbs until we finished with all the chicken.  It’s probably more fun to make this at home than in school since he’d probably only get to coat one or two pieces in school.

The ingredients

The ingredients

Dipping and coating the chicken

Dipping and coating the chicken

The chicken turned out pretty good!  We substituted regular sliced cheese for the Parmesan cheese, and it worked out quite well.  We had to make two batches of crumbs, and forgot to put cheese for the second batch though.  That gave me the chance to taste the difference with and without cheese.  Asher liked the cheeseless popcorn chicken, but Ellery and I preferred the cheesy one.  This is quite consistent with how Ellery seems to take after me and have a more savoury tooth.

Voila!

Voila!

It’s a fun recipe to do at home.  From the smashing of the crackers to the systematic dipping of the chicken.  Try it!

Breaded Popcorn Chicken (we tripled the recipe for our dinner at home, though you still only need 2 eggs.)

Ingredients:
2 slices of chicken breast meat
1 tsp oyster sauce
1/2 tsp sesame oil
pinch of sugar
100g of crackers/biscuits and cornflakes (up to you the proportion of each)
4 tsp Parmesan cheese
2 eggs, separated (you only need the egg white)
Flour
Vegetable/olive oil

Directions:
1. Preheat your oven to 200 degrees celsius.

2. Wash and cut the meat into cubes, then marinate with the oyster sauce, sesame oil and sugar.

3. Make the bread crumbs next.  Mix the crackers/biscuits, cornflakes and Parmesan cheese together in a clean plastic bag then smash/pound until they resemble bread crumbs.  (Since we used sliced cheese we just tore it into tiny pieces and rolled it into the crumbs.)

4. Put some flour on a plate.  Now proceed to dip the chicken cubes into the flour, followed by the egg white, then the bread crumbs.  Be sure to flip the chicken cube a couple of times so that each ingredient evenly coats the entire piece of chicken.

5. Put a baking sheet on an oven tray to prevent the chicken from sticking.  Alternatively, rub some oil onto the tray.  Spread the chicken out on the tray then brush them with some oil.  Cook for 15 minutes, turning them over halfway through to ensure even baking.

Read Full Post »

I have fond memories of the one time I made pineapple tarts with my mum when I was a teenager.  I remember how fun it was to shape and decorate the tarts.  My mum and I have always enjoyed baking together, and we had a tendency to start baking late at night and continue past midnight.  Don’t know why, it always just happened that way.  It was always nice chatting with her though, a good time of bonding.

So this year I wanted to let the boys have a go at making pineapple tarts.  When I had made tarts with my mum,  I remember she had made the pineapple jam from scratch which was an enormous amount of work!  I was very sure I wanted to skip the arduous task of making my own jam, so bought the Red Man brand premium pineapple jam from Phoon Huat.  The premium version is made from only good quality, ripe pineapples, whereas the cheaper version (can’t remember what it’s called on the packet) is made from any pineapple.

I am picky about my pineapple tarts.  If I like it I can eat many at a go, but if I don’t like it I gag at having to finish even one yucky pineapple tart.  I know most people nowadays like the closed pineapple tarts, and some shops seem to only sell that version.  I really really don’t like that kind of pineapple tart.  It’s too soft and mushy.  Even the most crisp of them on the outside and still too soft on the inside.  It’s like a sticky mess in the mouth when you eat it.  Same goes for the open pineapple tarts.  Once someone says it’s so yummy because it “melts in your mouth”, I can pretty much guess it’s the kind I don’t like.

I like an open tart that has a a crisp pastry.  None of that melty, sticky business please.  So I scoured the internet for a recipe that I liked.  Almost all of them touted the soft melt-in-the-mouth kind.  Skip.

Finally I stumbled upon a recipe at Papa Cooks! for a Nyonya pineapple tart that is cripsy.  His description of how the tarts ought to be like told me it was just the kind of tart I was looking for.  The fact the the recipe was also passed down from his aunt who is regarded as the master of pineapple tarts in his family also won me over.

So I bought my ingredients and settled the boys down to an evening of baking.  The recipe is easy enough, and the tarts came out perfect!  The boys and I ate sooo many.  I thought we had made a ton of pineapple tarts and was wondering who we could give them away to.  But once I tasted them and saw how the boys scarfed them down, I wondered if we had enough to give away at all!

They certainly had a great time making the tarts.  They did everything, and I only helped a little bit.  They mixed the ingredients, cut out the dough, did the egg wash, rolled the balls of jam, placed it on the tarts and did the decorations (which were very funny :)  not traditional at all, but full of humour and love).

I love their decorations!

I love their decorations!

At one point they kept saying they wanted to make a giant pineapple tart, and they each proceeded to shape a tart way bigger than the usual size.  They topped it with a ton of pineapple filling as well.  After the tarts were baked, Asher struck an agreement with me that he was going to have just 3 tarts since it was already late.  He started with his giant tart which was equivalent to five tarts.  When I said he was done, he asked me innocently, “but what about the other 2?”  I laughed and told him nice try.  But in the end he won, the tarts were so good, he ate way more than 3 (including the giant tart)!

Scooping a giant jam ball

Scooping a giant jam ball

Asher's giant tart

Asher’s giant tart

Ellery's giant tart

Ellery’s giant tart

See how big the giant tarts are!

See how big the giant tarts are!

I’d definitely want to make these again next year, but will make sure we start much earlier in the day.  The recipe is easy, but putting the tart together takes a lot a lot of time.

Anyway here is the recipe adapted from Papa Cooks!:

Pastry Ingredients:
– 500g plain flour
– 300g unsalted butter (slightly softened)
– 2 eggs
– 1 tsp salt
– 2 tbsp icing sugar
– 1 egg yolk (for use as the egg wash)

Making the dough:
1.  Mix the flour, icing sugar and salt together in a large bowl.

2.  Using a fork, scrape the flour and butter together until it resembles bread crumbs.  Using a fork prevents the butter from melting too fast, spoiling the pastry.

2.  Add the eggs and still using the fork, gently coax all the crumbs together until they just bind into a dough. Do not over mix the dough.  This is crucial to ensure the pastry will be crispy after baking.

3.  Shape the dough into a ball, wrap it in cling wrap and refrigerate for at least half an hour.

Assembling the Tart:
1.  Pre-heat your oven at 175 degrees Celcius.

2.  While the dough is refrigerating, roll the pineapple jam into small balls (use your cutter to estimate the correct size the jam balls should be – not too big, not too small).

3.  Take chunks of dough, squash them with your palm into the desired thickness.  (This is the kid-friendly method.  Using rolling pins just means more washing up, and fighting over who gets to roll it.  I like to let each kid have his own baking sheet so that they have their own space and can squash their own dough.)

4.  Cut the dough using the pineapple tart shaped cookie cutter, arrange neatly onto the baking tray and brush with egg wash.

5.  Put the jam balls onto the tarts, adjusting the size of the jam balls if necessary.

6.  Decorate the tarts however you want, traditional or otherwise, then egg wash the whole tart again.

7.  Pop into the oven for about 20 minutes, or until the tarts turn golden brown.

They each did their own half of the tray.  This was just tray #1.

They each did their own half of the tray. This was just tray #1.

Ready for the eating! (and one already eaten)

Ready for the eating! (and one already eaten)

Pleased as pineapple

Pleased as pineapple

"Good" he says approvingly

“Good” he says approvingly

My first attempt at a photo grid!

My first attempt at a photo grid!

Read Full Post »